REPAIRING OF PLASTER

FOLLOWING ARE THE PROCESS INVOLVE IN REPAIRING THE PLASTER


1. Setting up Scaffolding:
Scaffolding if required for the proper execution of the repair work should be erected. A ladder can also be used in case of scaffolding if the work can be done safely.

2. Cutting of Old Plaster:
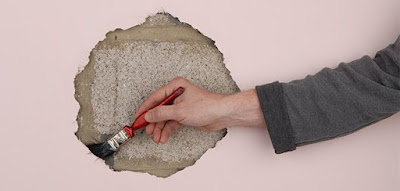
The mortar of the patch, where the existing plaster has cracked, crumbled or sounds hollow when gently tapped on the surface, is first removed. The patch is to be cut out to a square or rectangular shape at position where repairing is needed. The edges of cut plaster is made under cut to provide a neat joint.

3. Preparation of Surface:
The masonry joints which become exposed after removal of old plaster is raked out to a minimum depth of 10 mm in the case of brick work and 20 mm in the case of stone work. The raking is carried out uniformly with a raking tool, and loose mortar is dusted off. The surface is then thoroughly washed with water, and kept wet till plastering is commenced.
In case of concrete surfaces, the old plaster is thoroughly scrubbed with wire brushes after the plaster had been cut out and pock marked the surface is roughened by wire brushing and all the resulting dust and loose particles cleaned off. The surface is washed and cleaned and kept wet till plastering is commenced.

4. Application of Plaster:
Mortar of specific mix such as CM 1:4 or CM 1:6 with the good quality plaster sand is used. After the plaster has been applied to the surface, finishing of plaster is done to match with the old surrounding plaster. All dismantled mortar & rubbish etc.

5. Protective Measure:
Doors, windows, floors, articles of furniture etc. and such other parts of the building should be protected from being splashed by mortar.

6. Curing of plaster:
Curing of plaster is necessary to prevent cracking. It should be done for at least 3 days at regular interval.

7. Finishing of plaster:
After the plaster is thoroughly cured and dried the surface is then painted with the colour of the surrounding area.
Comments

Popular posts from this blog

Pre-plaster inspection checklist

PLASTER INSPECTION Ensure all the checks ( Brickwork Checklist ) after block work is complied with. The aluminium template for openings (sometimes we use sand to cover the electric holes) should be available at the site. The blockwork should have been cured for 7 days and dry before plastering is started. Button mark the surface to be plastered keeping the minimum thickness. 12mm plaster is the desired thickness. The distance of button marks should be within an aluminium straight edge length. Plastering mesh should be 8” wide and fixed rigidly before plastering on the junction between concrete and masonry surface with steel nails / wooden plug and nails. This strip has to be plastered and cured for a minimum of 3 days before the entire wall is plastered. Get the plastering specifications like lime finish, trowel finish, sponge finish, rough plaster and zone of application clarified from architects. In the case of external plaster grooves, it can be incorpor...

Checklist for Brick Work - Supervision

BRICK WORK Brick wall is made by joining bricks with cement mortar. We make brick wall to arrange floor area for different purposes of uses. It also provides privacy to dwellers. Properly made brick wall increase the beauty of building and rooms. Today we are going to publish a quality checklist during making brick wall.  Of course for making quality brick wall we have to choose quality bricks.  Soaking: Make sure bricks are soaked for at least 12 hours in clean water to remove salt and other chemicals from bricks. Cement Mortar: Make sure cement mortar is mixed properly in dry condition on a clean place. Check mixing ratio is properly maintained.  Check clean drinking water is mixed.  Make sure the mixed mortar is used within one hour after adding water. If you want, you can maintain register for tracking mixing time and ratio.  Wall: Check wall is located as per drawing at the time of making brick layout. Don't make wall above 5 feet in sam...